Наряд для куклы своими руками

I love crafting for my kids. My mother says, I’m indulging them. She says that they don’t appreciate my work enough. I think it’s not valuing that is important, but what my kids feel when they get a handmade gift from me. And I know they feel my love.

Мне нравится делать вещи своими руками для дочек. Моя мама уверена, что я их балую. Она говорит, что они совершенно не ценят мою работу. Я считаю, что важно не то, насколько они её ценят, а то, что они чувствуют, когда получают от меня подарок ручной работы. И Я знаю, что они чувствуют мою любовь.

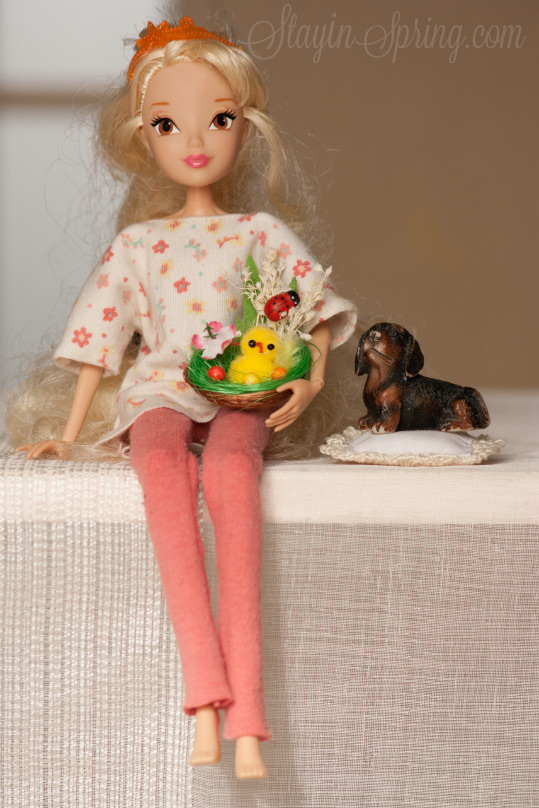
Veronica had a desire to bring her Winx doll to the kindergarten, but the doll couldn’t go outside in that cold in her super-light fairy dress. I volunteered to help Veronica and provide her doll warm cosy leggings and a modern top to complete the outfit.

Вероничке захотелось отнести в садик свою куколку Winx. Но не могла же кукла идти в такой холод на улицу в своём воздушном феечкином платьице. Я вызвалась помочь Вероничке и сшить для куклы уютные, тёплые леггинсы и модный топ в придачу.

IMG_7092

So today I’m going to share here a tutorial how to sew a modern outfit for a fashion doll from scraps (or old baby clothes) without any pattern.

Поэтому сегодня я покажу, как сшить современный наряд для куклы из обрезков (или старой детской одежды) без выкройки.

You will need old baby tights for the leggings, a piece of jersey for the top, a needle, scissors, a thread and pins.

Вам понадобятся старые детские колготки для леггинсов, кусочек трикотажа для топа, иголка, нитки, ножницы и булавки.

DIY Doll Leggings

Леггинсы для куклы своими руками

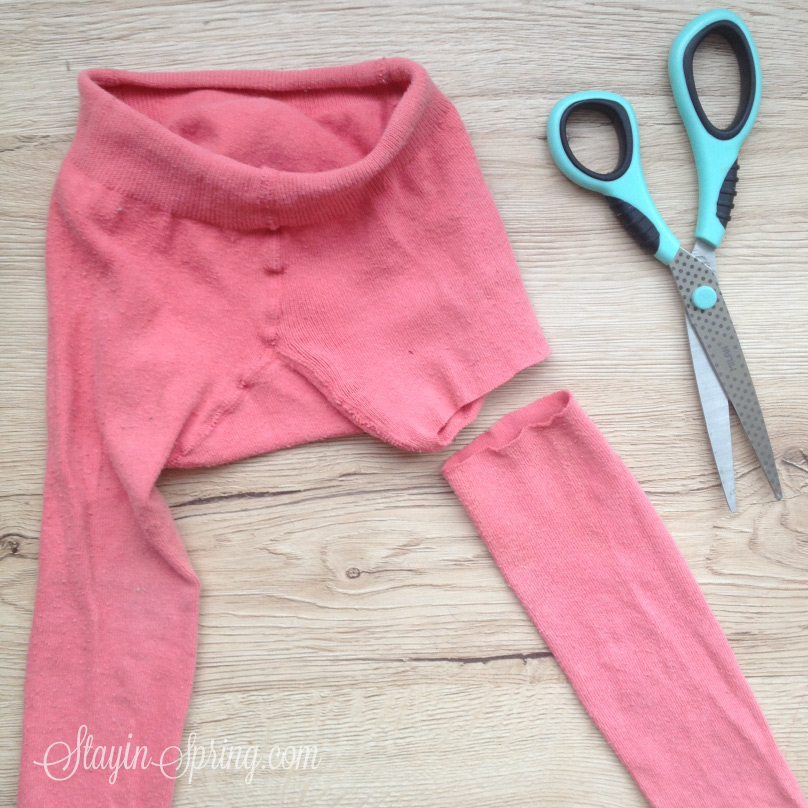
I took Marge’s tights she had grown out of and cut one of the legs off from the top and the bottom. The piece was longer then doll’s legs. This was for the leggings.

Для леггинсов я взяла старые Маргошины колготки, из которых она уже успела вырасти, и отрезала одну штанину сверху и снизу. Отрезанный кусок ткани был длиннее ног куклы.

Photo-31.03.15,-14-28-59

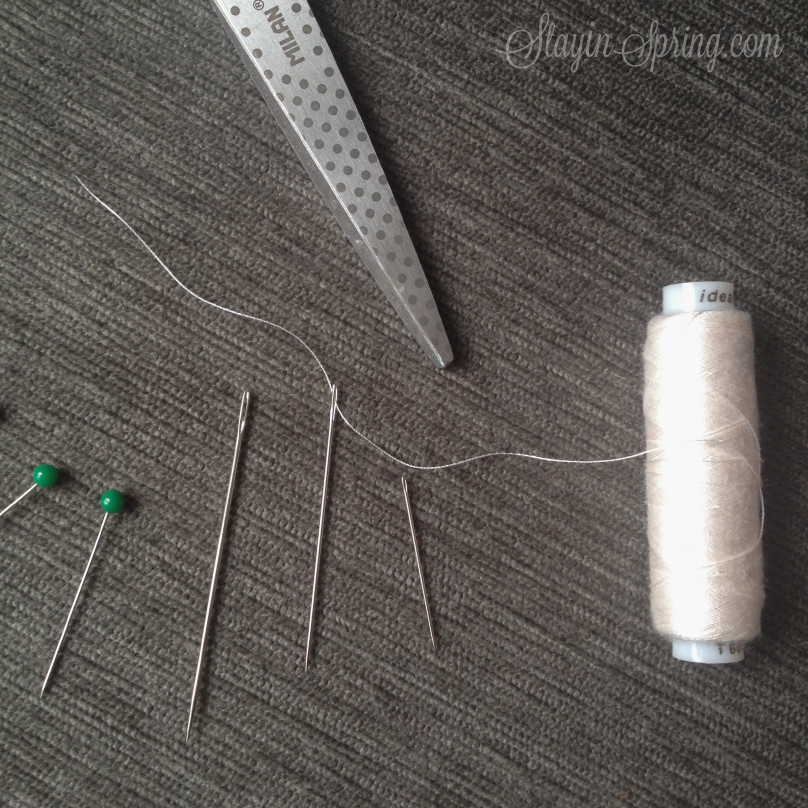
I took some pins and chose the needle. I would suggest you to choose a medium sized needle for sewing jersey. Look at the size of mine (the one with the thread):

Я подготовила булавки и выбрала иголку. Для трикотажной ткани советую использовать иголку чуть подлиннее. Вот какого размера была мною выбранная игла (та, в которую вставлена нить).

Photo-02.04.15,-14-52-31

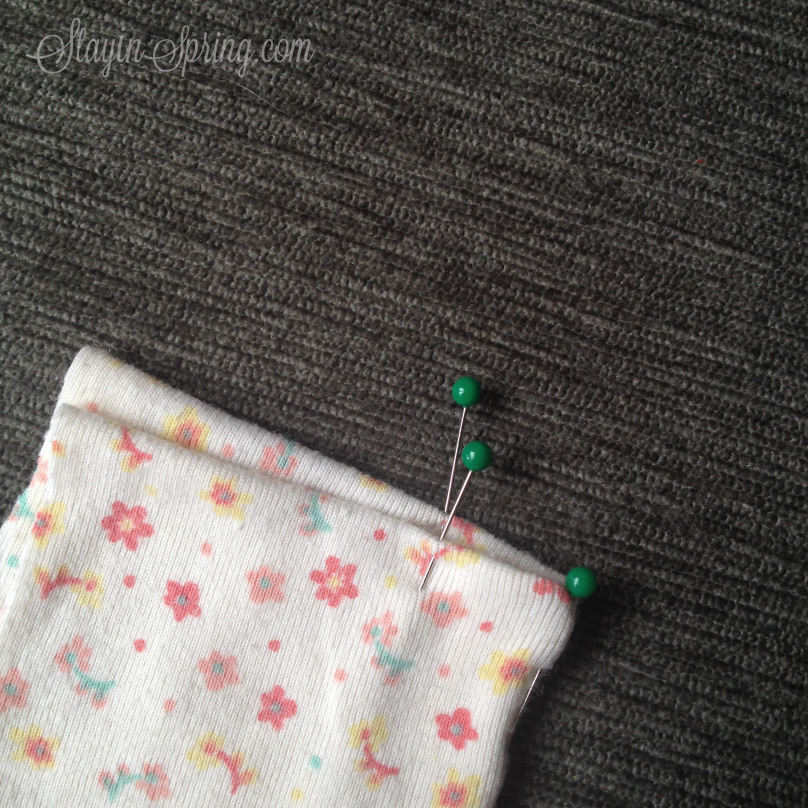
Then I wrapped the doll in the “sock” with the wrong side out and pinned together the fabric on her waist so that the “sock” would sit tight on the doll. I did the same thing for the legs gathering all extra fabric on the back between legs, so that I could see where to make the seam that had to go from one leg’s foot to the crotch and then to the second leg’s foot.

Обернув куклу в “носок” изнанкой наружу, я приколола булавкой так, что ткань держалась у куклы на талии. То же самое я сделала для обеих штанин, собрав все излишки ткани сзади между ног, чтобы понять, где делать шов, который должен пройти от одной ступни наверх до промежности, и затем вниз до второй ступни.

Photo-31.03.15,-14-41-22

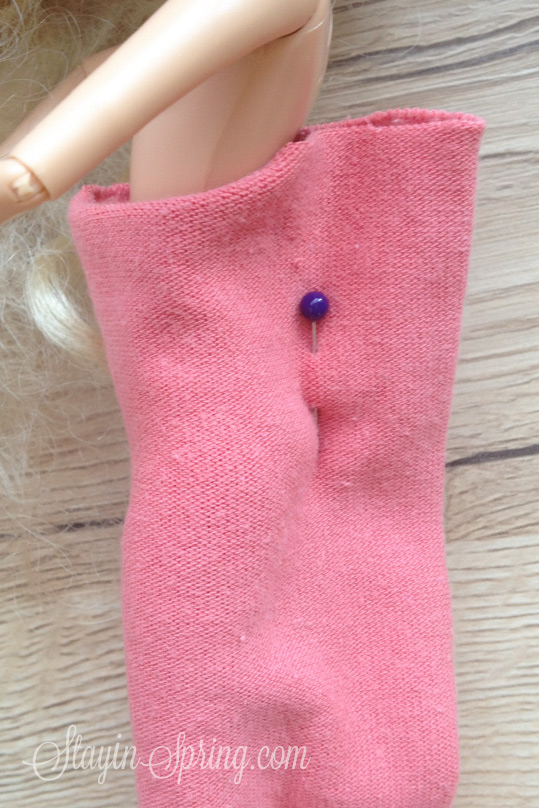
I sewed with a back stitch (it’s important to use the back stitch rather than a running stitch when sewing jersey, because this stitch stretches with the fabric). Parallel parts of the seam were very close in the front, so I had to make sure that there were at least 3 mm between the legs, so that I could cut the fabric between them after sewing both  of the pants legs.

Я шила швом “назад иголкой” (важно использовать именно этот шов, а не обыкновенный — сметочный, так как этот тянется вместе с тканью). Параллельные части шва шли очень близко друг-другу спереди изделия, поэтому мне надо было внимательно следить, чтобы между ними оставалось хотя бы 3 мм, чтобы потом я смогла сделать разрез и разделить штанины.

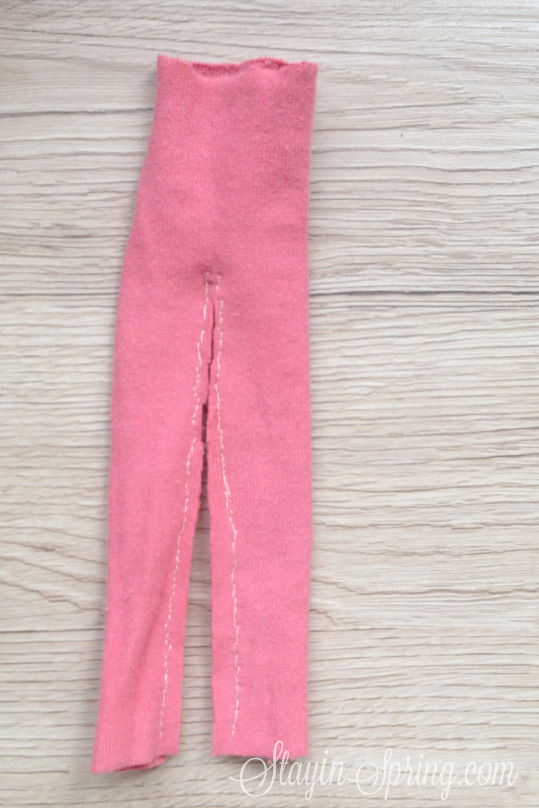
This is how the back looked after sewing and cutting between the legs and cutting off the extra fabric.

Вид сзади после разреза и отрезания лишней ткани.

Photo-31.03.15,-17-38-12

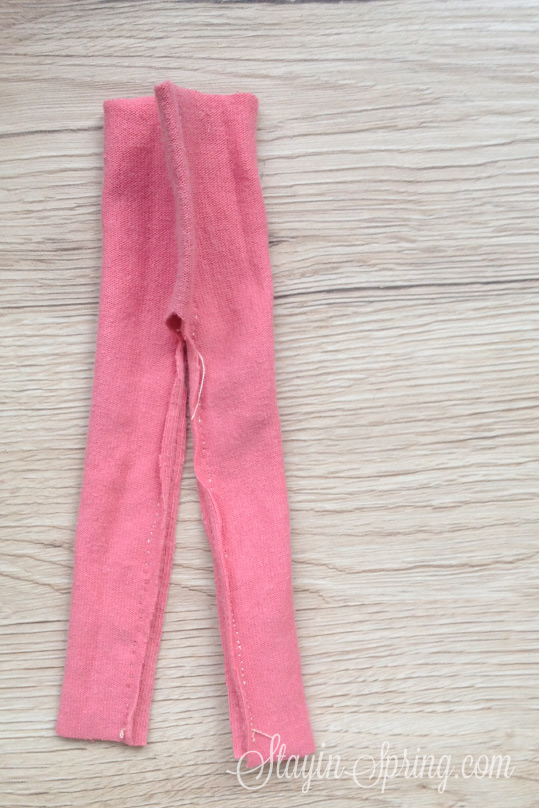
And this is how the front looked (no extra fabric on the front to cut off, as you see).

Вид спереди после разреза (спереди, как видите, лишней ткани на отрезание не было).

Photo-31.03.15,-17-37-45

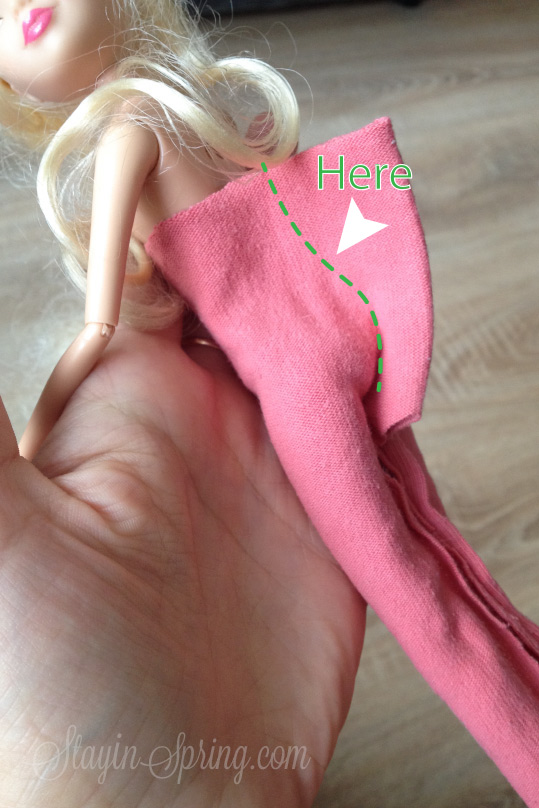
And this is how it looked on the doll. After that I just had to make the last back seam (the place for it is marked with the green dotted line on the picture below). I sewed it right on the doll.

А вот так будущие штаны в тот момент сидели на кукле. После этого мне оставалось лишь сделать последний шов (место для которого отмечено зелёным пунктиром на фото ниже). Я прошила его прямо на кукле.

Photo-31.03.15,-17-39-10

Ok, I actually also folded the waist edge inside towards the wrong side and made a seam there too.

По правде говоря, я сделала ещё один шов –подогнула ткань сверху вовнутрь и прошила там тоже.

Photo-02.04.15,-14-42-05

DIY Doll Top

Топ для куклы своими руками

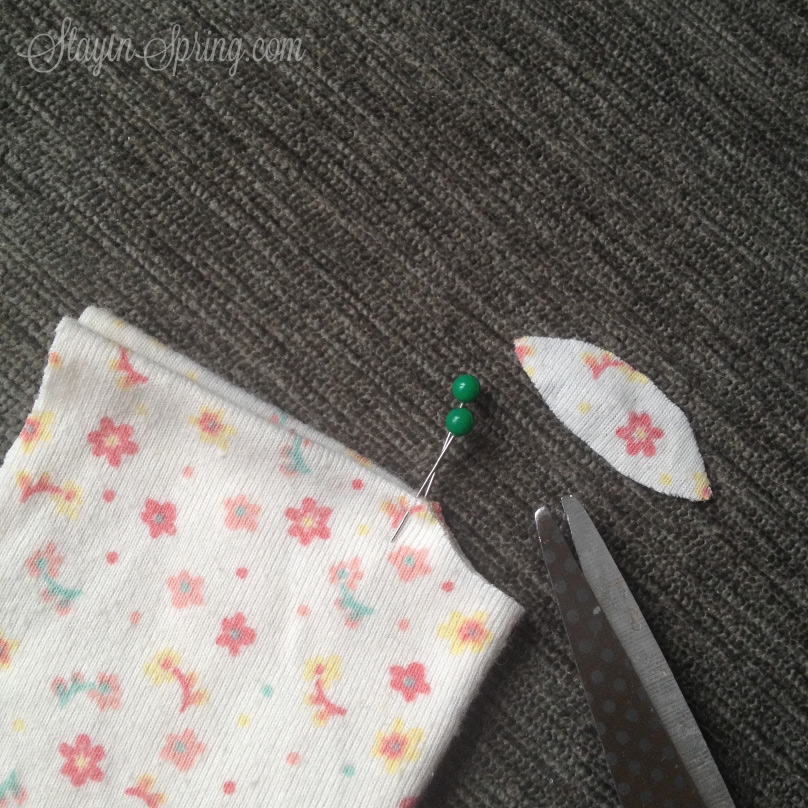
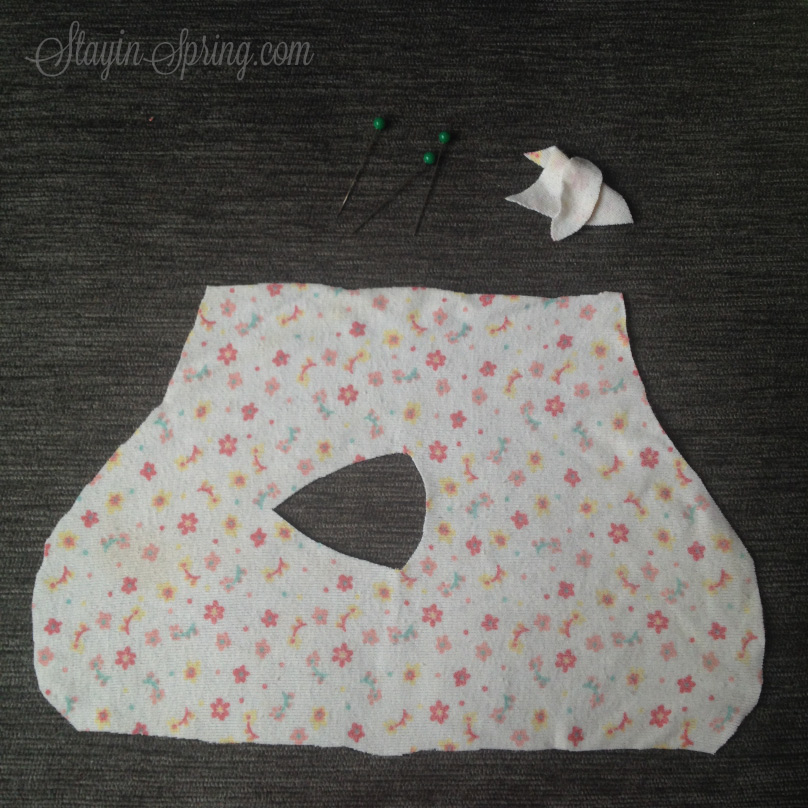
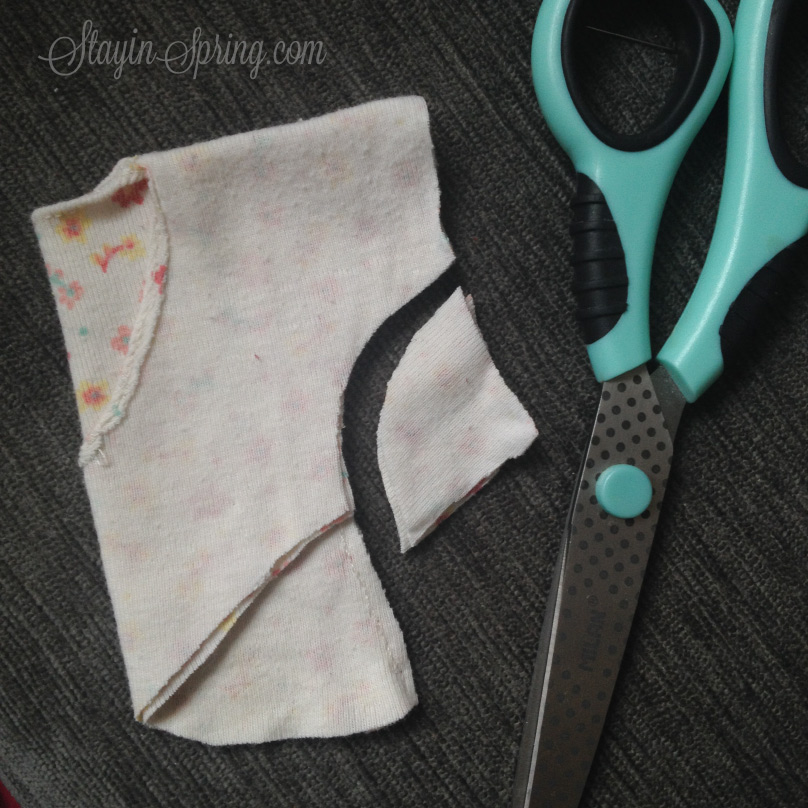
Then it was time to sew the top. This one was made from Marge’s old bodysuit (the fabric was too cute, so I couldn’t help it). I cut out a rectangle-shaped peace and folded it in half so that the fabric covered the dolls body. I decided to make asymmetrical bottom of the top, so I cut it curved, the way I wanted it to be.

Затем настало время для топа. Его я сшила из старого Маргошиного бодика (не смогла противостоять его симпатичному узору). Для этого я вырезала прямоугольный кусок ткани и согнула его пополам, убедившись, что ткань покрывает тело куклы. Мне захотелось сделать ассиметричный нижний срез, и я обрезала ткань так, как мне хотелось.

Photo-02.04.15,-14-41-08

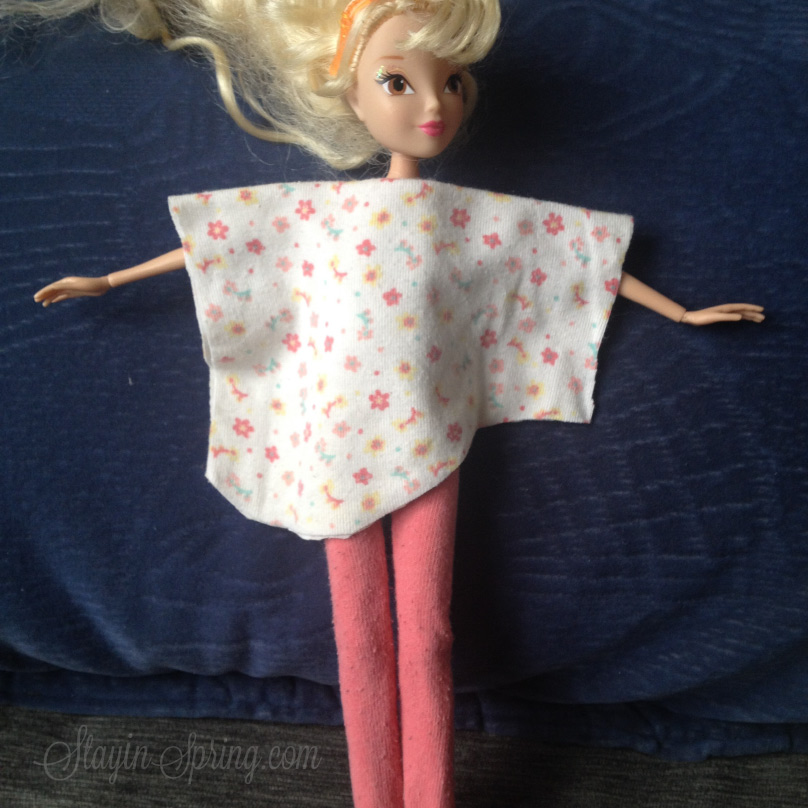
I folded the fabric once more in half and pinned the middle.

Я отметила середину булавкой, сложив ещё раз ткань пополам.

Photo-02.04.15,-14-44-20

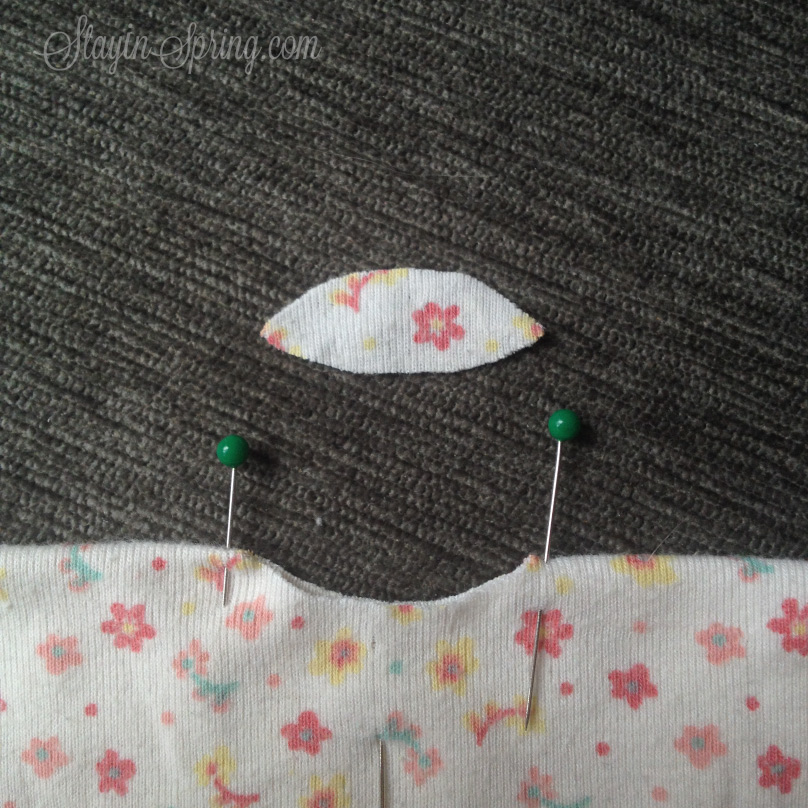
I unfolded it and marked with a pin the place where the shoulder begins.

Затем расправила ткань и отметила булавками место, где начинается плечо.

Photo-02.04.15,-14-45-08

Folding again in half here…

Снова сложила пополам…

Photo-02.04.15,-14-45-59

… to cut out an opening for the neck.

… чтобы вырезать горловину.

Photo-02.04.15,-14-47-16

Photo-02.04.15,-14-47-48

Then I folded the fabric vertically and cut out a triangle on the back (because the dolls head is big, and because bare backs are trending now).

Затем сложила ткань вертикально пополам и удлинила разрез горловины, отрезав ещё треугольник со стороны спины (потому что у куклы крупная голова, ну, и голые спины нынче в тренде).

Photo-02.04.15,-14-49-19

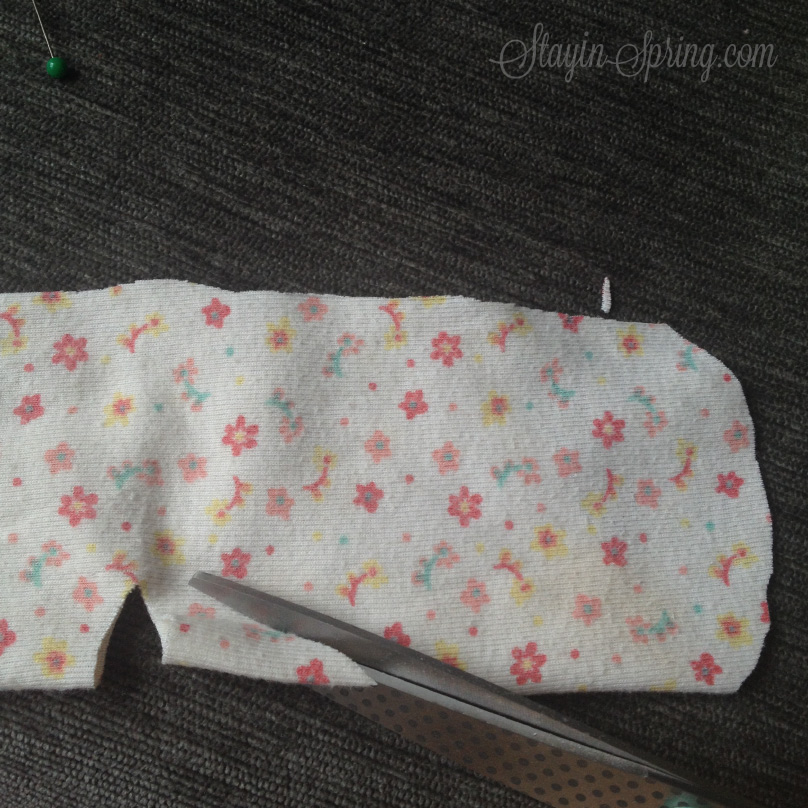
This is how it looked unfolded.

Вот, как теперь ткань выглядела в разложенном виде.

Photo-02.04.15,-14-50-34

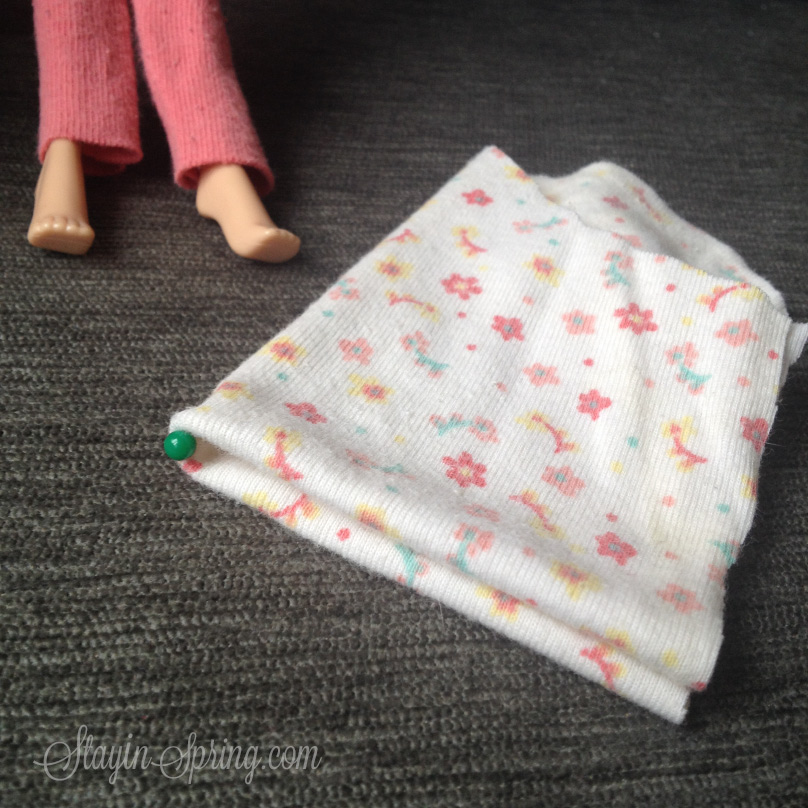
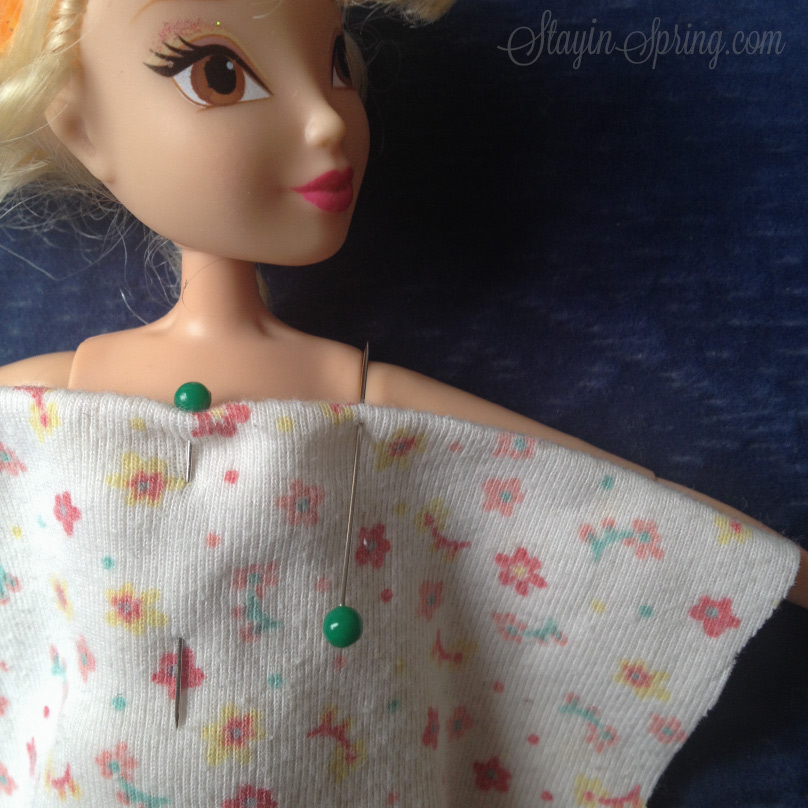
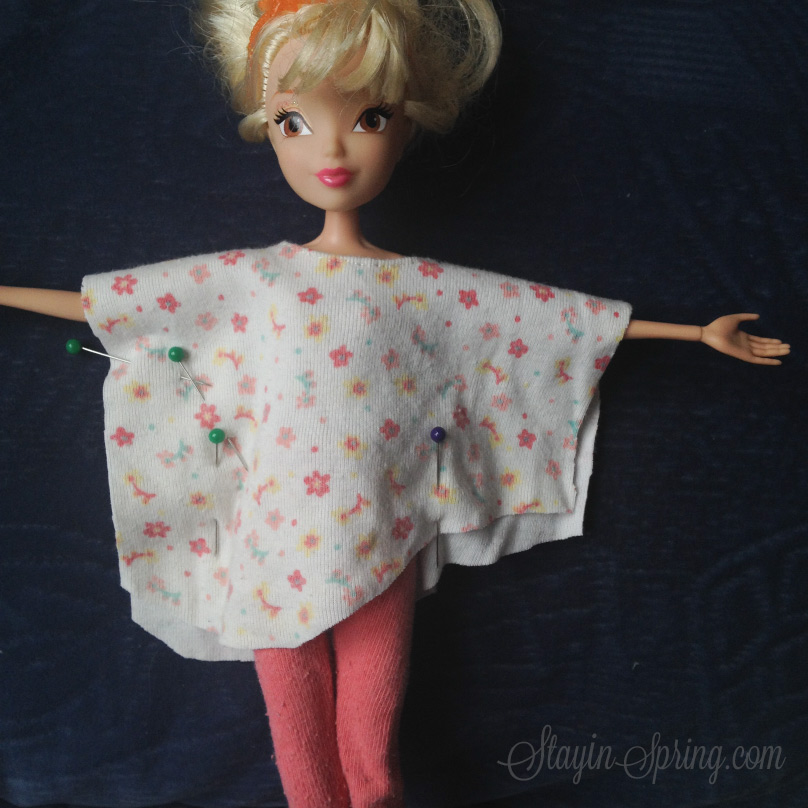
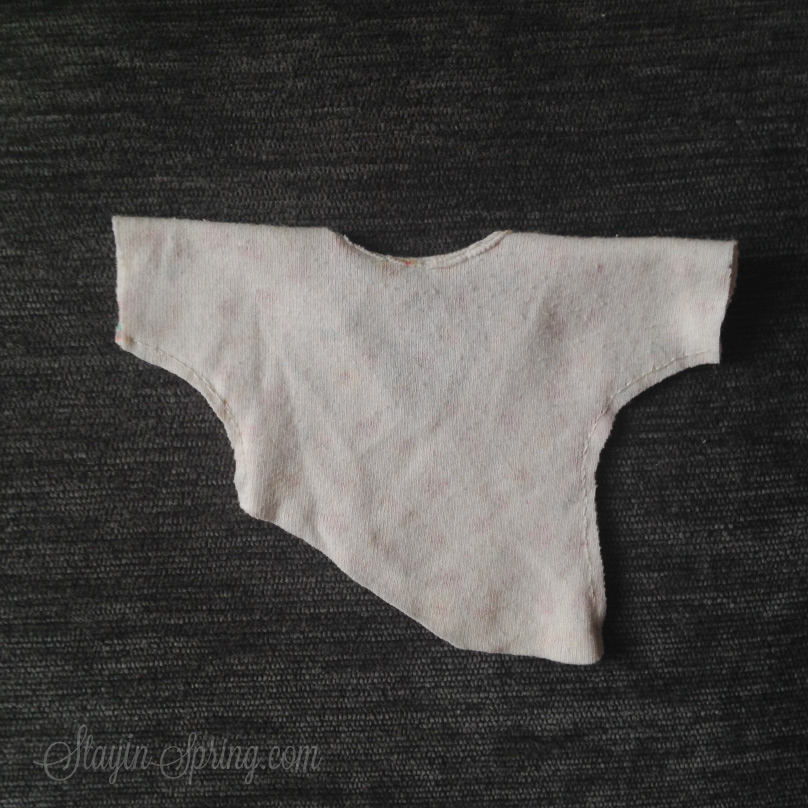
I folded 2mm of the fabric on the neck opening towards the wrong side and sewed along the edge. Then the doll had her first try-on and I pinned the places for the side seams.

Я обработала горловину, отогнув примерно 2 мм ткани вовнутрь и сделав по краю горловины шов. Затем у куклы была первая примерка, а я отметила булавками места для боковых швов.

Photo-02.04.15,-15-50-21

And made a cut from the long side.

И отрезала ткань с длинной стороны.

Photo-02.04.15,-15-54-34

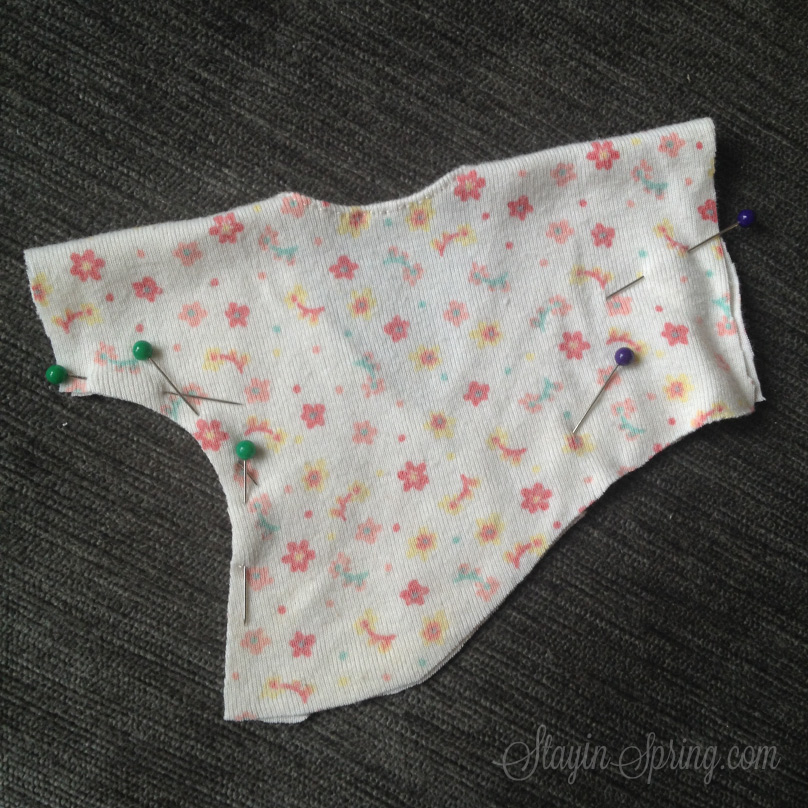
I sewed the first side seam making the allowance of 2mm, folded the fabric to make the next symmetrical cut.

Боковой шов я прошила с припуском 2 мм, затем согнула изделие пополам, чтобы отрезать ткань со второй стороны.

Photo-02.04.15,-16-04-27

Photo-02.04.15,-16-05-41

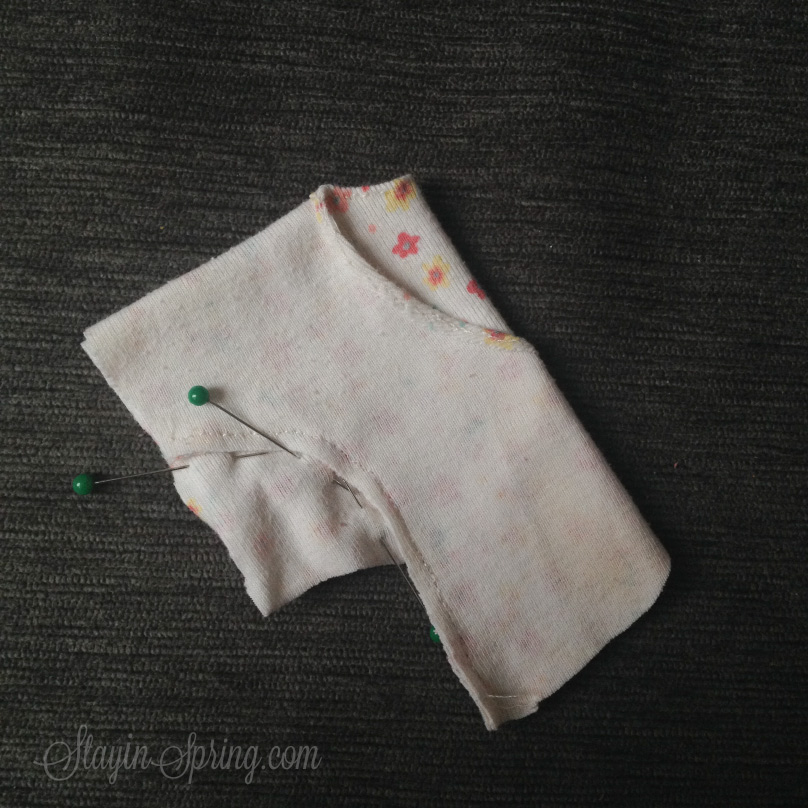
I made the second side seam and decided to leave the bottom as it is. Usually I like to process all of the edges, but I was in hurry and the fabric didn’t crumble.

После того, как второй боковой шов был готов, я решила оставить низ изделия не обработанным. Обычно я предпочитаю так не делать, но спешка сделала этот выбор за меня. К тому же, ткань не осыпалась.

Photo-02.04.15,-17-18-54

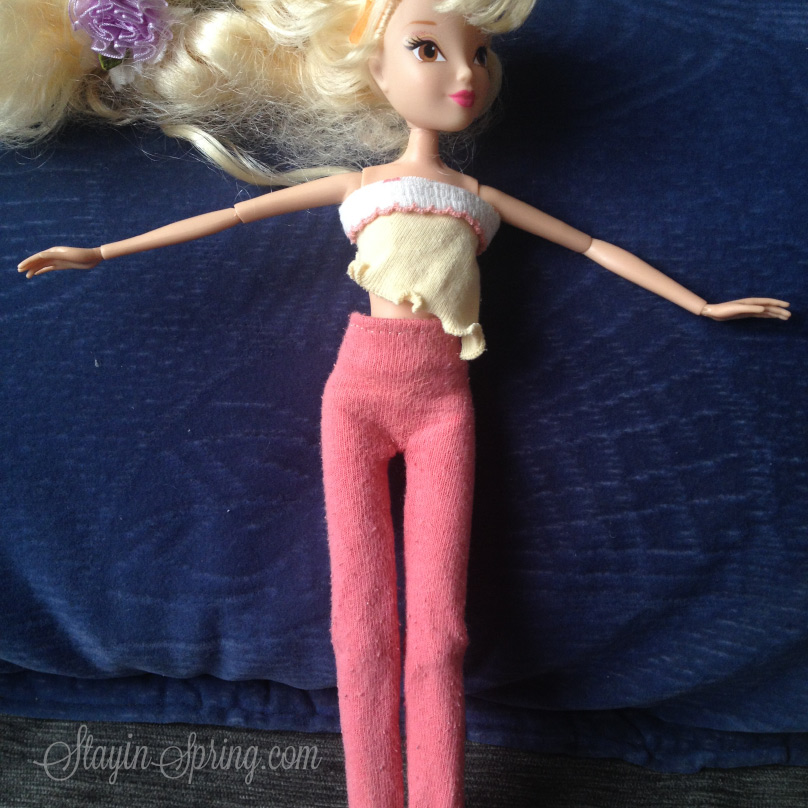
And then the outfit for our Winx was ready: the leggings and the top. Oh this little happy doll and her precious owner!

И вот, наряд для Winx готов: леггинсы и топ. Ах, эти маленькая счастливая куколка и её  милая хозяюшка!

IMG_7085