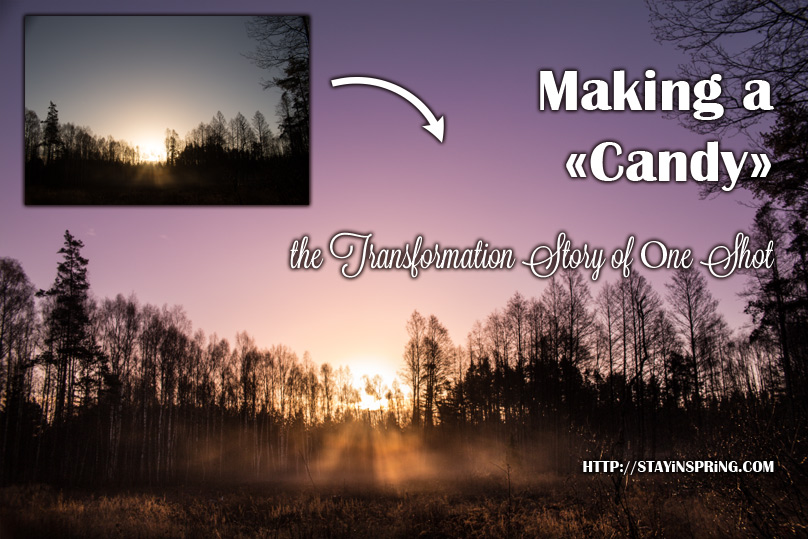
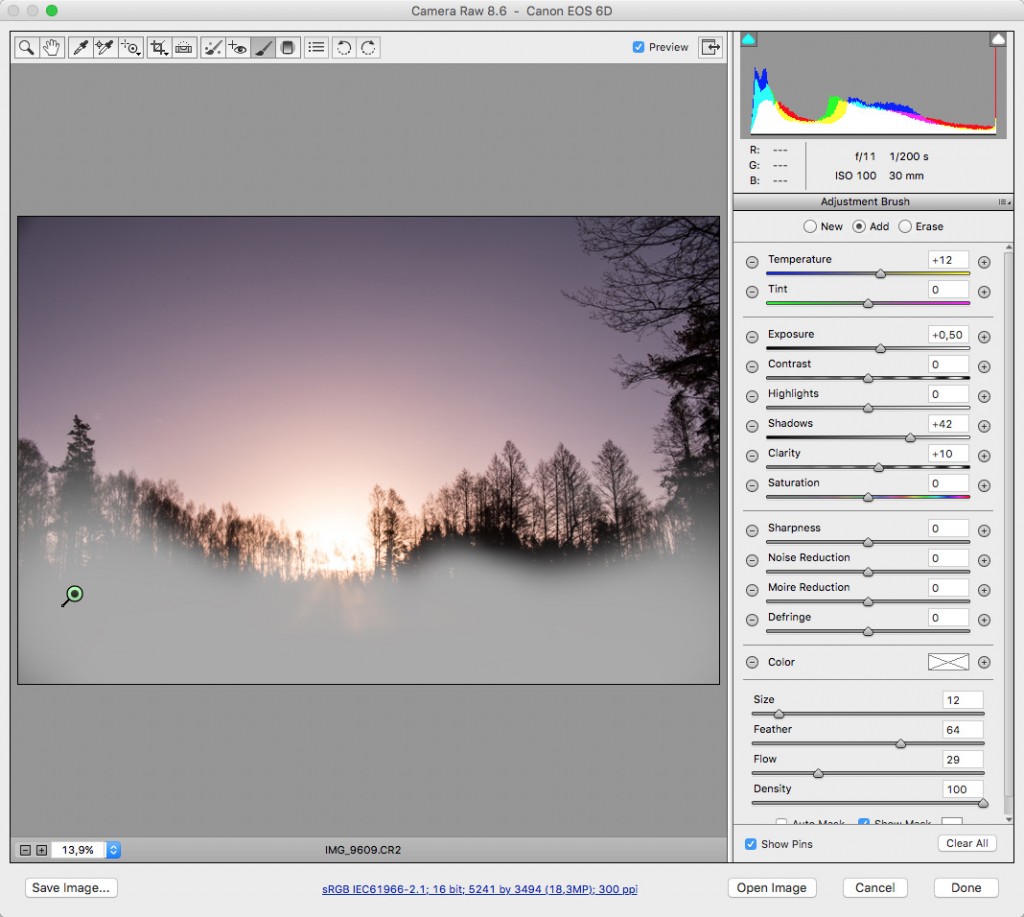
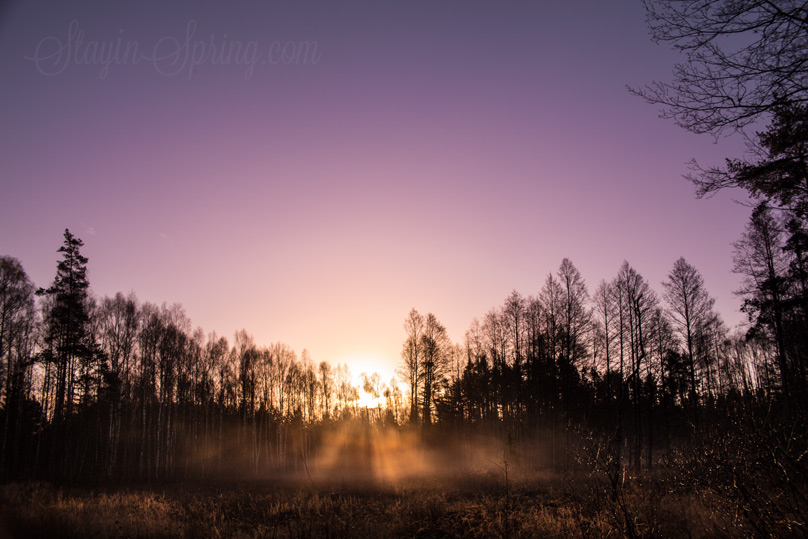
When we were at the swamp last Sunday, there was that fog and I wanted to capture a beautiful picture of the sunrise with rays of the sun shining through the fog. Right before we were going to leave, I snapped this shot. Honestly, I didn’t think of it as of a keeper, but I decided to give it a chance. This post is about the transformation I made to this shot in post-processing. I fully edited it in ACR (Adobe Camera Raw) and I’m going to share all of my steps here.
В прошлое воскресенье,
когда мы встречали утро на болоте, там был небольшой туман. Мне очень хотелось сфотографировать лучи утреннего солнца, проходящие через него. Прямо перед уходом в надежде на удачу я сделала этот кадр. Честно говоря, первым моим порывом было сразу его выкинуть. Но всё же было решено дать ему шанс. Этот пост о трансформации, через которую прошёл этот кадр. Вся обработка этой фотографии прошла в ACR (плагин для Фотошопа Adobe Camera Raw), и я пройдусь по всем шагам в нём.
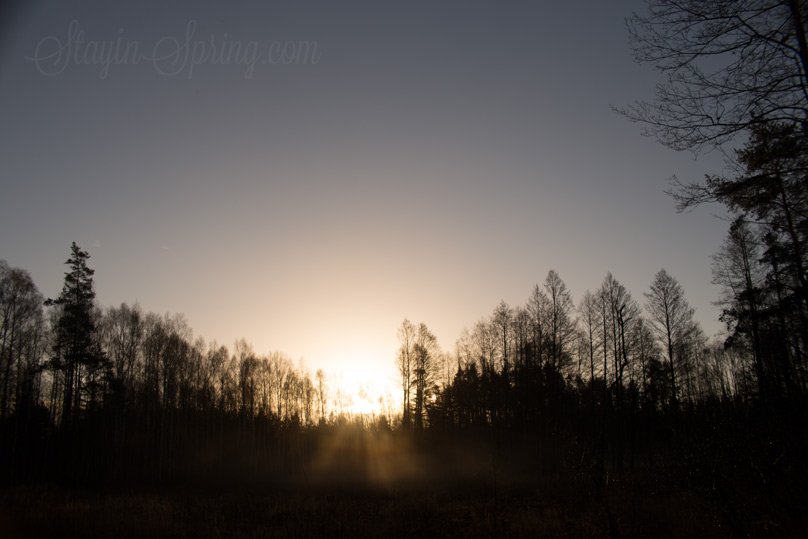
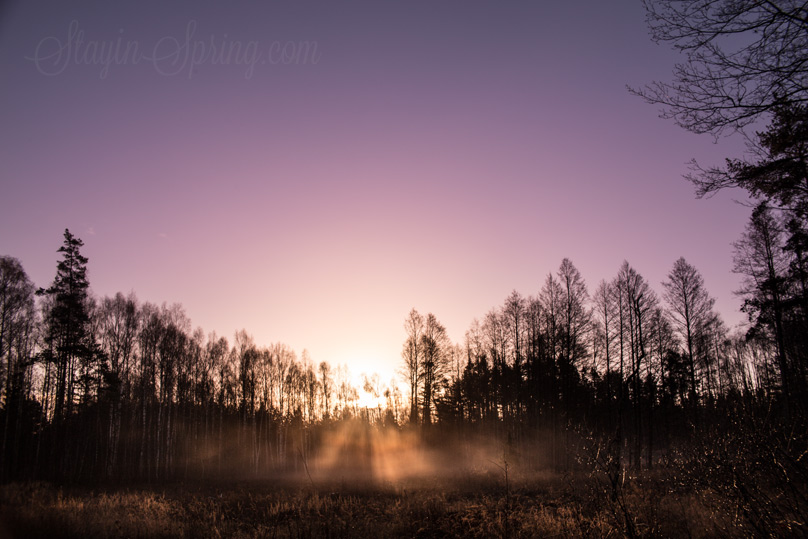
After some initial cropping and straightening the image looked like this:
После первоначальных выпрямления и лёгкого кропа фото выглядело вот так:
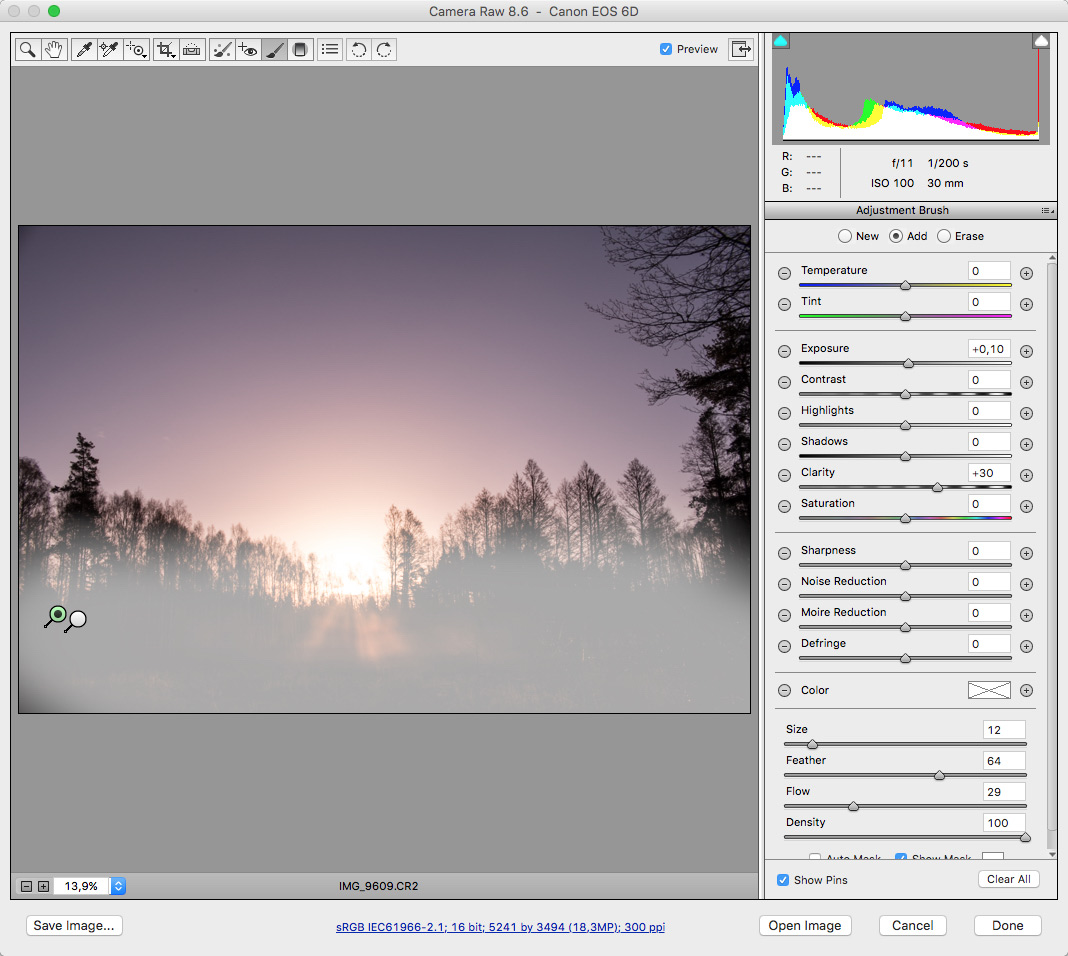
Step 1. Basic adjustments. First of all I added some clarity to see if I can get those sun rays more prominent.
Шаг 1. Основные настройки. Для начала я повысила Clarity, чтобы убедиться, что могу сделать лучи отчётливее.

I also changed the whole tone of the image adding A LOT of magenta. My tint setting went from +9, as it was in camera, to +48. I love that landscapes oftentimes make it possible to set the White Balance creatively.
Я также изменила общую тональность фото, добавив ОЧЕНЬ много мадженты. Настройка tint взлетела от +9, как было настроено в камере, до +48.

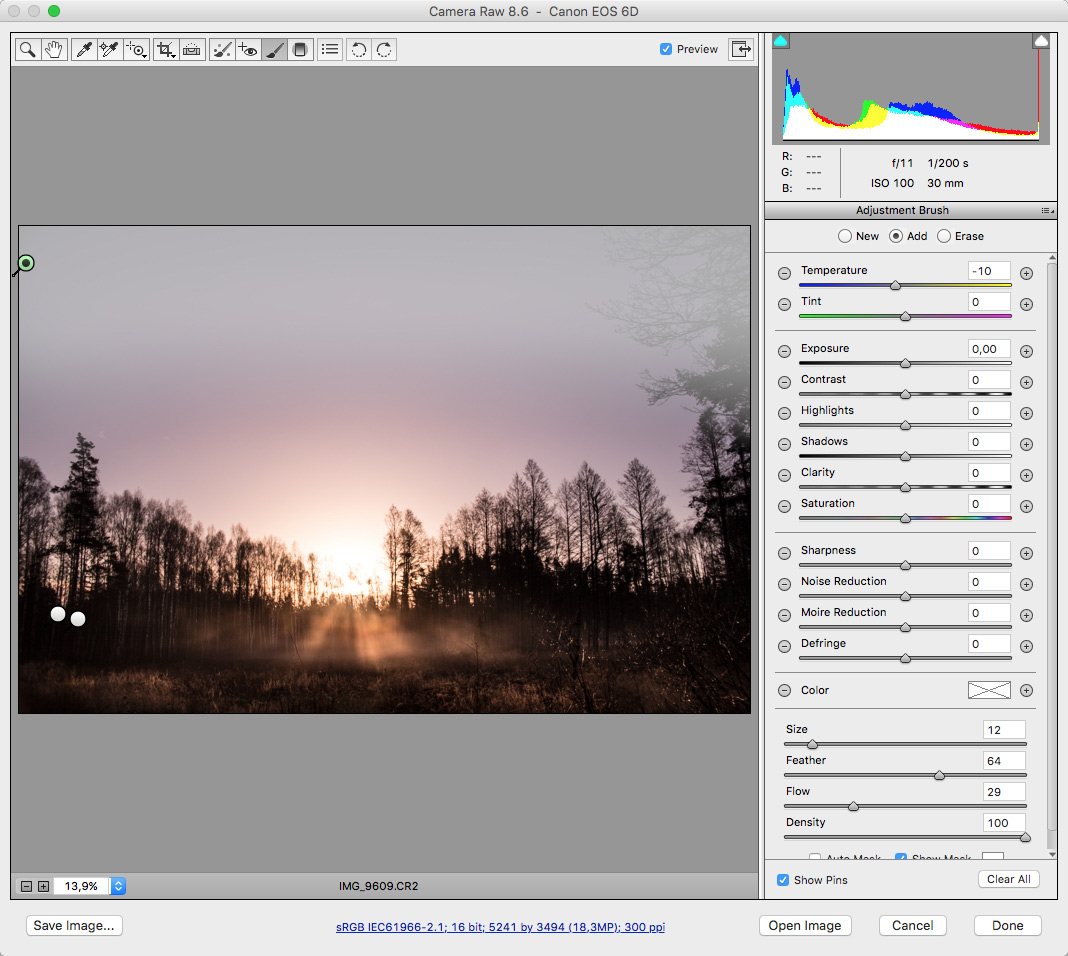
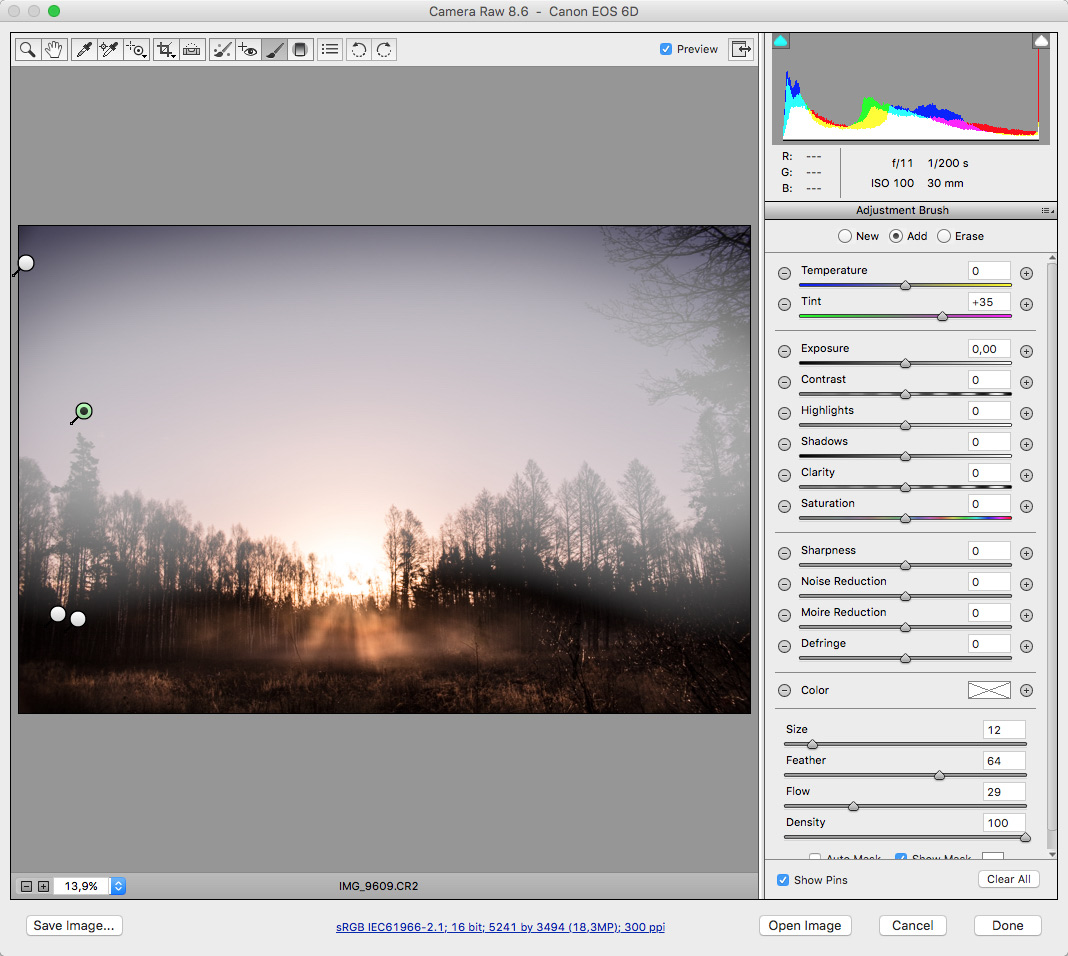
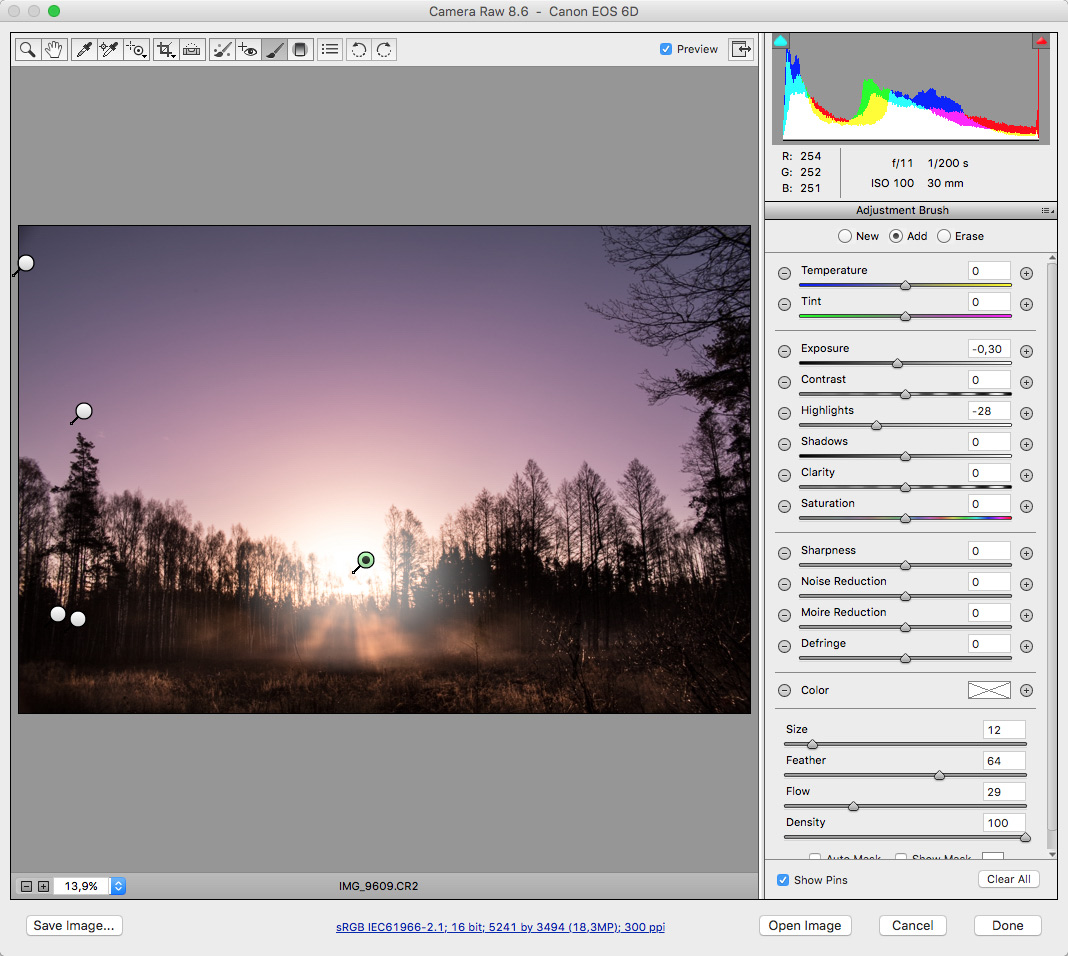
Step 2. Then I made some selective adjustments via Adjustment Brush tool.
Шаг 2. Дальше я перешла к настройкам с помощью Adjustment Brush tool, которая позволяет влиять на выборочные области фото.
1) Added some more Clarity to the bottom of the image. I also made the rays brighter adding warmth to them, and lifted up Shadows to bring out the grass.
1) Ещё увеличила Clarity в нижней части фото. Также повысила чуть-чуть экспозицию, сделала лучи ярче и теплее. Подняла Shadows, вытащив из тени траву.
2) Added even more Clarity (and lifted up the exposure just a tad).
2) Добавила ещё больше Clarity (и ещё чуть-чуть подняла экспозицию).

3) Made the upper part of the sky more blue, like it usually is right before the sunrise.
3) Верхнюю часть неба сделала более синей, как это бывает перед рассветом.

4) Made the middle part of the sky even more purple to make it pop by adding more Magenta.
4) Центральную часть неба сделала ещё более фиолетовой, чтобы переход цветов стал заметнее, перетянув ползунок Tone в направлении Мадженты.


5) Brought down the exposure and Highlights in the sun area.
5) Затемнила экспозицию и опустила Highlights в области солнца.

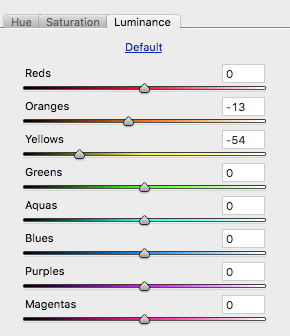
Step 3. Working in the HSL panel. I still didn’t like the trees being blowed out, so I selectively lowered the brightness of the oranges and yellows in the Luminance tab.
Шаг 3. Продолжаю работу в панели HSL. Деревья возле солнца всё ещё сильно высвечены, поэтому в закладке Luminance делаю темнее жёлтые и оранжевые.
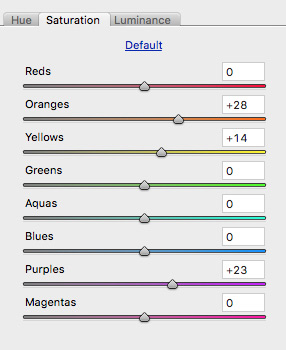
Step 4. As a final step I added some more saturation to the purples, oranges and yellows.
Шаг 4. В качестве последнего штриха добавляю яркости фиолетовым, оранжевым и жёлтым в закладке Saturation.
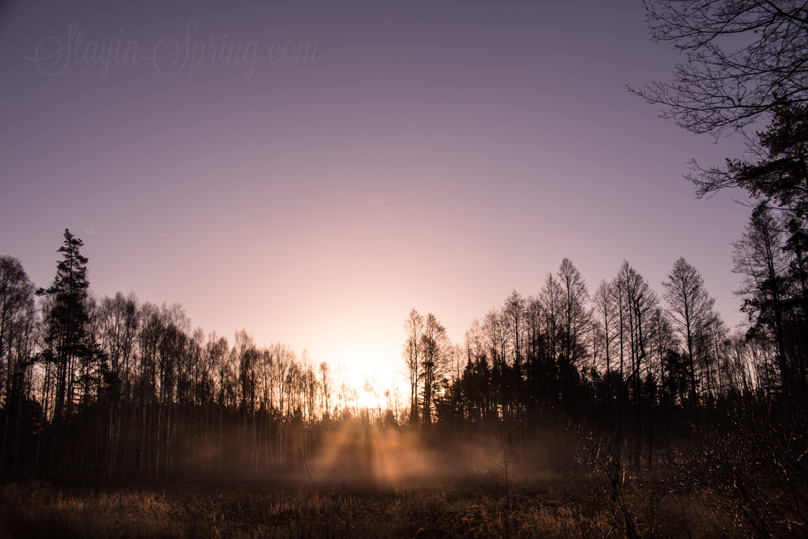
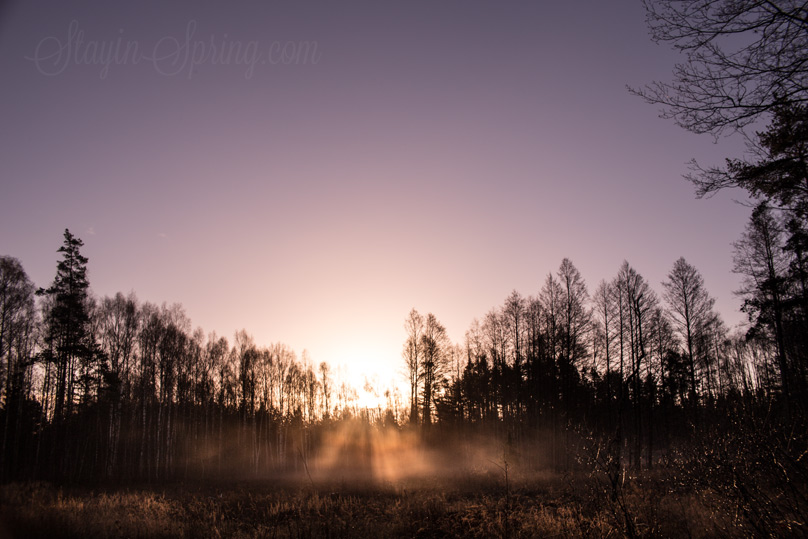
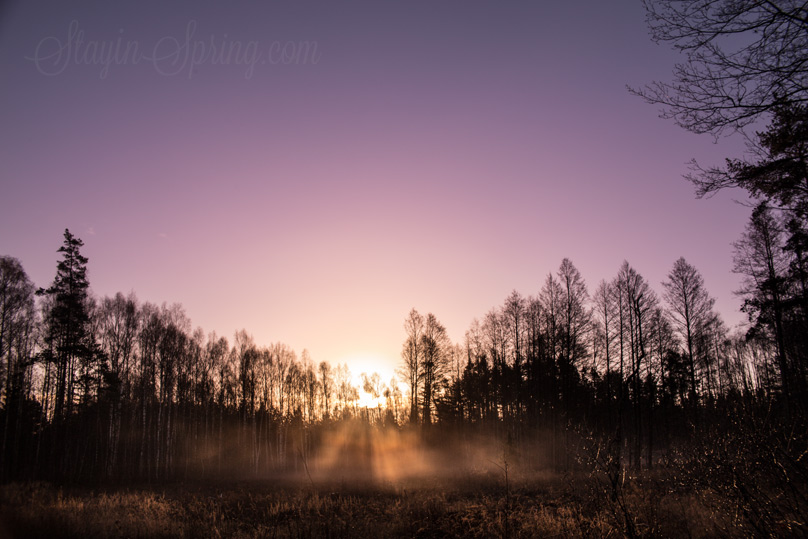
The result:
Результат:
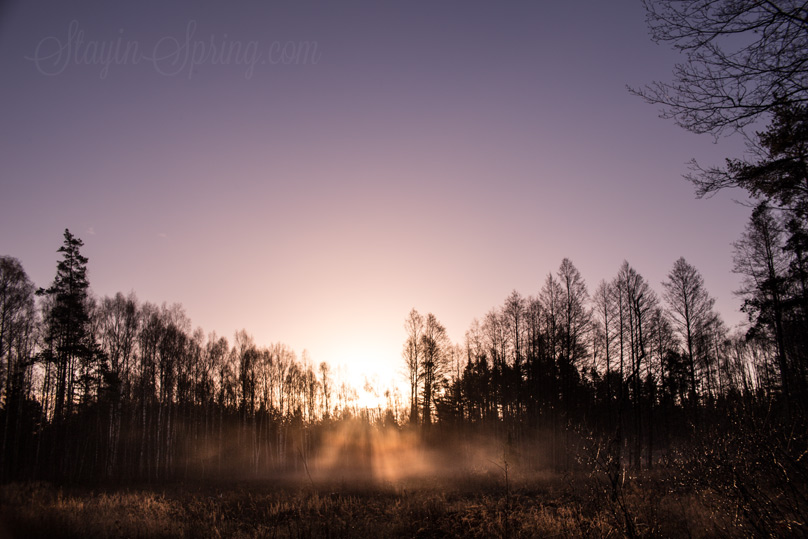
The before shot:
И ещё раз — снимок, как он выглядел до моих манипуляций:


 Привет, странник!